
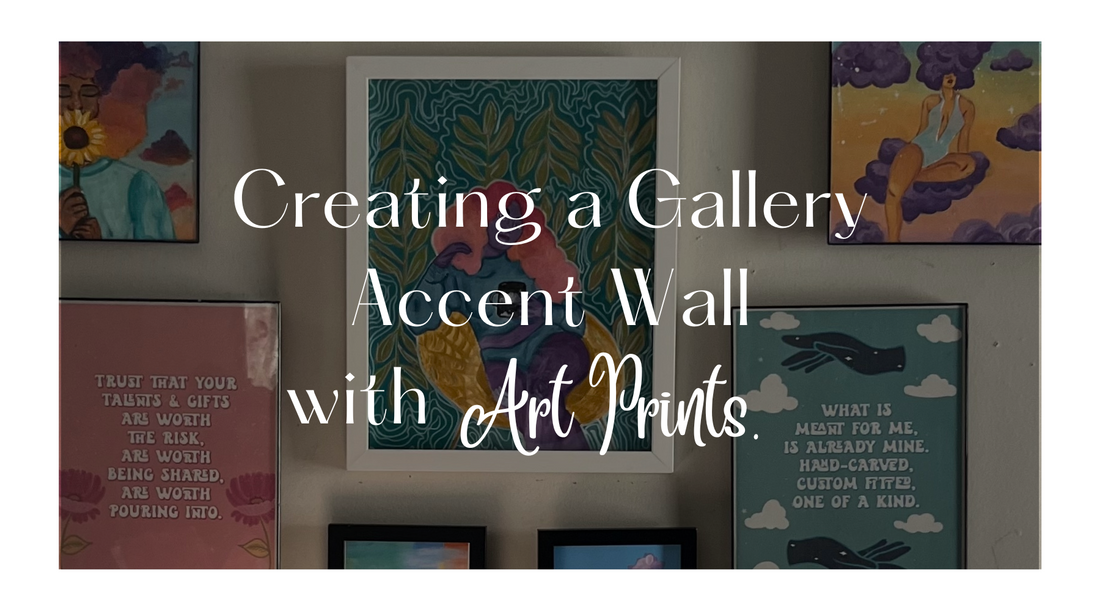
As the vibrant hues of spring begin to blossom outside, it's the perfect time to infuse some fresh energy into your home decor. What better way to do so than by creating a stunning gallery accent wall adorned with art prints?
Not only does this DIY project allow you to add a personalized touch to your living space, but it also provides an opportunity to support artists without breaking the bank while bringing a burst of color indoors.
Here are 5 simple steps to take a boring wall and transform it into your own personalized gallery accent.
TLDR: Watch this video version instead.
____________________________________________________________________
Step 1: Choose Your Art Prints
The first step in creating a gallery accent wall is selecting the perfect art prints. Look for pieces that resonate with your personal style and complement the aesthetic of your home.
Whether you prefer bold abstract designs, serene landscapes, or vibrant floral motifs, there are so many options available to suit every taste. You should also consider opting for a mix of sizes and styles to add visual interest to your gallery wall. Think patterns, metallic accents, textures even to add an exciting mix to your stand out accent wall. If you are an avid art collector, don't miss out on my current BOGO print sale, where you can grab 1 and get 50% off a second piece.
Step 2: Plan Your Layout
Before you start hanging your art prints, take some time to plan the layout of your gallery wall. Consider factors such as the size and shape of your wall, the placement of furniture, and the overall aesthetic you want to achieve.
You can experiment with different arrangements by laying the prints out on the floor or using masking tape to outline their positions on the wall. Aim for a balanced composition with an even distribution of colors, shapes, and textures.
Once you've found the perfect arrangement, gather your materials, including frames or mounting hardware, a level, measuring tape, and a hammer.
Step 3: Hang Your Art Prints
Once you've finalized your layout, it's time to hang your art prints. Measure and mark the placement of each print on the wall to ensure accuracy. Use a level to ensure that your prints are straight and evenly spaced.
If you're using nails, gently hammer them into the wall at the marked points. Alternatively, adhesive strips offer a damage-free option for renters or those who prefer not to use nails.
Starting from the center and working outward, begin hanging your art prints according to your layout. Use your measuring tape to ensure equal spacing between each print, and double-check with the level to ensure they're straight.
Step 4: Add Personal Touches
With your gallery accent wall, don't be afraid to add personal touches to make it truly unique. You can incorporate other decorative elements such as mirrors, shelves, wall candle holders, 3D pieces, hanging plants, or decorative accents to enhance the visual impact.
Step 5: Step Back and Enjoy
Once all your prints are hung, step back and admire your handiwork! Your gallery accent wall is now ready to impress guests and serve as a reflection of your style and creativity. Take a moment to appreciate how the curated collection of art transforms your space into a gallery-worthy masterpiece.
In conclusion, creating a gallery accent wall with original art prints by artists is a fantastic way to elevate your home décor while supporting emerging and rising talents .Follow the tips and steps outlined in this guide, and soon you'll have a visually stunning display that reflects your unique style and values. Happy decorating and be sure to grab yourself a print or two during my BOGO art print sale.